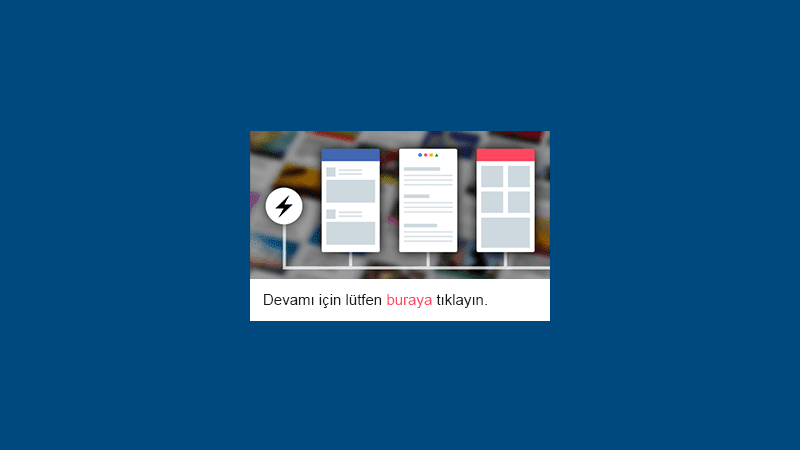
AMP HTML Pop-up Bildirim Kutusu - AMP kullanıcıları için, blog açıldığında bir Pop-up bildirim kutusu oluşturmayı paylaşacağım. Daha önce, blog siteleri için HTML modal bildirim kutusu oluşturmayı paylaşmıştım.
Bknz: Blogger AMP Modal Bildirim Kutusu
Açılan bildirim kutusunda bir promosyon ürünü, bir blog yayını veya banner reklamı görüntülemek için kullanılabilir. Bu Pop-up bildirim kutusunu oluşturmak için bir önceki yaımızda paylaştığımız "AMP Komut ve Kısa Kodları"dan faydalanacağız. Blogunuza AMP bildirim kutusunu eklemek için, aşağıdaki adımları takip edin.
AMP HTML Pop-up Bildirim Kutusu Nasıl Eklenir?
Aşağıdaki CSS kodlarını blogunuzda bulunan amp-custom stil dosyası içerisine ekleyin.
@font-face{font-family:'Roboto';font-style:normal;font-weight:400;src:local('Roboto'),local('Roboto-Regular'),url(https://fonts.gstatic.com/s/roboto/v16/CWB0XYA8bzo0kSThX0UTuA.woff2) format('woff2'),url(https://fonts.gstatic.com/s/roboto/v16/2UX7WLTfW3W8TclTUvlFyQ.woff) format('woff'),url(https://fonts.gstatic.com/s/roboto/v16/QHD8zigcbDB8aPfIoaupKOvvDin1pK8aKteLpeZ5c0A.ttf) format('truetype')}
@font-face{font-family:'Roboto';font-style:normal;font-weight:500;src:local('Roboto Medium'),local('Roboto-Medium'),url(https://fonts.gstatic.com/s/roboto/v16/RxZJdnzeo3R5zSexge8UUVtXRa8TVwTICgirnJhmVJw.woff2) format('woff2'),url(https://fonts.gstatic.com/s/roboto/v16/RxZJdnzeo3R5zSexge8UUT8E0i7KZn-EPnyo3HZu7kw.woff) format('woff'),url(https://fonts.gstatic.com/s/roboto/v16/RxZJdnzeo3R5zSexge8UUSZ2oysoEQEeKwjgmXLRnTc.ttf) format('truetype')}
*{-moz-box-sizing:border-box;-webkit-box-sizing:border-box;box-sizing:border-box}
.notifbox{width:100%;height:100%;position:fixed;top:0;left:0;justify-content:center;z-index:10000;display:flex;align-items:center;}
.notif_box{background:#fff;color:#555;padding:0;top:15%;transition:all .3s ease-in-out;font-family:Roboto,sans-serif;position:absolute;width:50%;box-shadow: 0 1px 8px rgba(0,0,0,.3);left:50%;margin-left:-25%;z-index:99;border-radius:4px;z-index:2;overflow:hidden;}
.notif_box p{margin:0;font-size:14px;font-weight:400;padding:10px 20px;line-height:1.3}
.notif_box p a{font-weight:500;color:red;text-decoration:none;}
.notif_box p a:hover{color:#333}
.notifbox .close_notifbox{border:none;padding:0;cursor:pointer;width:20px;height:20px;line-height:20px;text-align:center;z-index:2;background:0 0;color:#efefef;font-size:30px;position:absolute;top:7px;right:5px;}
.notifbox .close_notifbox:focus,.notifbox .done_notifbox:focus{outline:none}
.notifbox .close_notifbox:hover{color:red}
.slideInDown{-webkit-animation-name:slideInDown;animation-name:slideInDown;-webkit-animation-duration:1s;animation-duration:1s;-webkit-animation-fill-mode:both;animation-fill-mode:both}
@-webkit-keyframes slideInDown{0%{-webkit-transform:translateY(-100%);transform:translateY(-100%);visibility:visible}100%{-webkit-transform:translateY(0);transform:translateY(0)}}
@keyframes slideInDown{0%{-webkit-transform:translateY(-100%);transform:translateY(-100%);visibility:visible}100%{-webkit-transform:translateY(0);transform:translateY(0)}}
Aşağıdaki HTML kodu blogunuzun </body> kodunun bir satır üzerine ekleyin.
<div class="notifbox" id="notifbox">
<div class="notif_box slideInDown">
<button class='close_notifbox' on='tap:notifbox.hide' role='button' tabindex='0' title='Kapat'>&times;</button>
<amp-img alt="" height="470" layout="responsive" src="https://blogger.googleusercontent.com/img/b/R29vZ2xl/AVvXsEg3QQpYc25ZmL_8svC5LxIzzd4r37bcTcF0ZX80YynhX4w0VFOpsQ7Q-UDn5Wfdvh1WoMbmsyzTWUfCc-FNUaQoHDgqm5MogdmJenp0QXZK4ecE0lY7vyL9ZrSJH2ZlKw5DzxQJq2ozSGkF/s1600/blog.png" title="Etiket" width="940"></amp-img>
<p>
Devamı için lütfen <a href="#" title="buraya">buraya</a> tıklayın.
</p>
</div>
</div>Görünümü amp-img ve catatannya uygun olacak şekilde ayarlayın.
Yukarıdaki bildirim kutusu kodu, blog ziyaret edildiğinde, sayfalar açıldığında veya sayfaların yenilenmesi durumunda bildirim kutusu görünür.
Ancak, AMP bildirim kutusunun sadece bir kez görüntülenmesini istiyorsanız ve blog ziyaretçilerinin bildirim kutusunu kapatması durumunda, kullanıcıların tarayıcı çerezlerini temizlemesi/silmesi durumunda bildirim kutusu görüntülenecektir. Yani bildirim kutusu kapatıldığında blog sayfalarının yenilenmesi durumunda bildirim kutusu görünmeyecektir.
Bu, AMP bildirim kutusu blogunuza eklemek istiyorsanız, yukarıdaki kodları blogunuza eklemeyin. Aşağıdaki CSS kodlarını blogunuzda bulunan amp-custom stil dosyası içerisine ekleyin.
*{-moz-box-sizing:border-box;box-sizing:border-box;-webkit-box-sizing:border-box;}
.notifbox{width:100%;height:100%;position:fixed;display:flex;top:0;left:0;align-items:center;justify-content:center;z-index:10000}
.notif_box{background:#fff;border-radius:4px;box-shadow: 0 1px 8px rgba(0,0,0,.3);color:#555;font-family:Roboto,sans-serif;position:absolute;padding:0;top:15%;transition:all .3s ease-in-out;width:50%;left:50%;margin-left:-25%;z-index:99;z-index:2;overflow:hidden}
.notif_box p{padding:10px 20px;margin:0;font-size:14px;font-weight:400;line-height:1.3}
.notif_box p a{color:#f44336;text-decoration:none}
.notif_box p a:hover{color:#333}
.notifbox .close_notifbox{background:0 0;cursor:pointer;width:20px;height:20px;line-height:20px;text-align:center;z-index:2;border:none;padding:0;color:#efefef;font-size:30px;position:absolute;top:7px;right:5px;}
.notifbox .close_notifbox:focus,.notifbox .done_notifbox:focus{outline:none}
.notifbox .close_notifbox:hover{color:#f44336}
.slideInDown{-webkit-animation-name:slideInDown;animation-name:slideInDown;-webkit-animation-duration:1s;animation-duration:1s;-webkit-animation-fill-mode:both;animation-fill-mode:both}
@-webkit-keyframes slideInDown{0%{-webkit-transform:translateY(-100%);transform:translateY(-100%);visibility:visible}100%{-webkit-transform:translateY(0);transform:translateY(0)}}
@keyframes slideInDown{0%{-webkit-transform:translateY(-100%);transform:translateY(-100%);visibility:visible}100%{-webkit-transform:translateY(0);transform:translateY(0)}}
Aşağıdaki AMP JS kodlarını blogunuzun </head> kodunun bir satır üzerine ekleyin. Eğer, blogunuzda bulunan AMP JS kodları arasında aşağıdaki AMP JS kodları bulunuyorsa tekrardan eklemeye gerek yoktur.
<script async="" custom-element="amp-user-notification" src="https://cdn.ampproject.org/v0/amp-user-notification-0.1.js"></script>
<script async="" custom-element="amp-analytics" src="https://cdn.ampproject.org/v0/amp-analytics-0.1.js"></script>
Aşağıdaki HTML kodu blogunuzda bulunan </body> kodunun bir satır üzerine ekleyin.
<amp-user-notification id="my-notification" layout="nodisplay">
<div class="notifbox" id="notifbox">
<div class="notif_box slideInDown">
<button class='close_notifbox' on='tap:my-notification.dismiss' role='button' tabindex='0' title='Kapat'>&times;</button>
<amp-img alt="" height="470" layout="responsive" src="https://blogger.googleusercontent.com/img/b/R29vZ2xl/AVvXsEg3QQpYc25ZmL_8svC5LxIzzd4r37bcTcF0ZX80YynhX4w0VFOpsQ7Q-UDn5Wfdvh1WoMbmsyzTWUfCc-FNUaQoHDgqm5MogdmJenp0QXZK4ecE0lY7vyL9ZrSJH2ZlKw5DzxQJq2ozSGkF/s1600/blog.png" title="Etiket" width="940"></amp-img>
<p>
Devamı için lütfen <a href="#" title="buraya">buraya</a> tıklayın.
</p>
</div>
</div>
</amp-user-notification>Yukarıdaki kodları ekledikten sonra blogunuzda amp-analitycs kodunun olup olmadığını kontrol edin. Yoksa aşağıdaki kodu da </body> kodunun bir satır üzerine ekleyin.
<amp-analytics id='analytics1' type='googleanalytics'>
<script type='application/json'>
{
  "vars": {
    "account": "UA-X0X0X0X0X0"
  },
  "triggers": {
    "trackPageview": {
      "on": "visible",
      "request": "pageview"
    }
  }
}
</script>
</amp-analytics>
Yukarıdaki kod içerisinde bulunan UA-X0X0X0X0X0 yerine analytics hesabınızdaki kod ile değiştirin.

Yorum Gönder